Friday, December 15, 2023

INSTALATION AND CHECK SNMP V2C ON HUAWEI AR161 ROUTER

 INSTALATTION OF SNMP V2C on router


<4,Akbar Road>system-view

 [4,Akbar Road]snmp-agent sys-info location 4AR

 [4,Akbar Road]snmp-agent sys-info version v2c

 [4,Akbar Road]snmp-agent community read gjhgdgsgffddfsdaffdfddg(Password)

[4,Akbar Road]snmp-agent target-host trap-paramsname pentagon v2c securityname scimplsvpn private-netmanager

[4,Akbar Road]save

Are you sure to continue?[Y/N]:y

  It will take several minutes to save configuration file, please wait.........................................................

  Configuration file had been saved successfully

  Note: The configuration file will take effect after being activated


HOW WE CHECK CONFIGURATION OF SNMP V2C

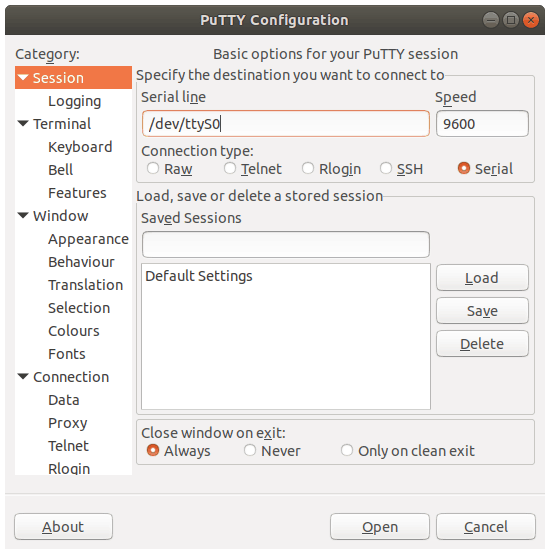
Login Router Through Tera Term or Putty

Run command

4,Akbar Road]display current-configuration | section snmp

 snmp-agent local-engineid 800007DB03B443269A5DE4

 snmp-agent community read %^%#w5|9>!Dm,A.7LzUlZM\I}arSVES]4$,)#{1P+\)D5'sV!;-@)(;'<##jqnXQP,-e,[kmF(5jznFtsl'A%^%#

 snmp-agent sys-info location 4AR

 snmp-agent sys-info version v2c

 snmp-agent target-host trap-paramsname pentagon v2c securityname %^%#y1^4/B^s0>4rA.#'}:]Q&&tnF}@<o$LRE_R,8BIG%^%# private-netmanager


Project: Company/Project Name

####SNMP V2C####

SNMP Agent: All edge router

SNMP Version: V2C

Community String: fdfjsdljflsjdflsdjflsdjfsdlfn(Password)

Securityname :  India


Sunday, December 10, 2023

Create of Host Group, Map and Host in Zabbix Server

How to create Host Group in Zabbix Server 

1. login Zabbix

after login select Data Collection > Host Group > Create Host Group 

Click on Create Host Group 
Here fill your Host Group Name and add it.  and than you will saw you group name in Host Groups.


To create Map on Zabbix Server

After Login Zabbix Click on Monitoring > Map 

Select Create Map and fill the name of your Map and add it.


The MAP is ready now you can Degine your all host on MAP.


To configure Host  
Click on Data Collection/Configuration( in old version will show Configuration and in new version showing Data collection)

Data Collection > Hosts > Create Host 

Fill your host name, host group and network device IP after fill all click on add

You can create multiple host like it. 


Clear the console login password of Huawei AR161

                   How to restore console password of Huawei AR161 Router

Note : Sometimes we forget console login password  of Huawei AR161 router, so for the break password..  

1: Restart the router 

2: In booting process will show 

    (Press Ctrl+B to break auto startup)

after press ctrl+B asking for default password of Huawei Router

3: Default Password = Admin@huawei

4: main menu 

   1. Default Startup
   2. Serial Menu
   3. Network Menu 
  4. Startup Select 
  5. File Manager
  6. Reboot
  7. Password Manager
 7 (to enter in password manager)

5: Password Menu
   1. Modify the menu password 
   2. Clear the console login password 
   3. Return
2 (to clear console login password)

After clear the console login password success 

Password Menu
  1. Modify the menu password 
  2. Clear the console login password 
  3. Return

                                               3 (to Return in main menu)

 main menu 

   1. Default Startup
   2. Serial Menu
   3. Network Menu 
  4. Startup Select 
  5. File Manager
  6. Reboot
  7. Password Manager
                                            1 (to start the default startup)

Note : To select option use only numeric key (like-7,2,3,1)


When will press 1 than he will automatically start to boot after complete boot in last option will ask for press any key to get started ....

after complete it all 

First configure the username and password by using of the aaa configuration then reboot the router and login again by using of new username and password....


For you support picture is attached


Friday, August 18, 2023

How to install Putty on ubuntu


How to Install PuTTY on Ubuntu 

Step 1

Login into Ubuntu Desktop. Press Ctrl + Atl + T to open GNOME terminal. If for some reason the shortcut didn’t work, run the Terminal from the Ubuntu Dash.


Step 2

Run the following command in the terminal.

>> sudo apt-get update

sudo apt-get update


Step 3

Install PuTTY using the command below.

>> sudo apt-get install -y putty

sudo apt-get install -y putty

 Step 4

PuTTY should be installed. Run it from the terminal using “putty” as command, or from the Dash.

>> putty


Optional: Compiling from source

While it is not recommended for beginners to compile PuTTY from source, one can choose to compile PuTTY from source. Download the PuTTY source files here. Extract the archive file using the command and follow the README file inside the archive to compile PuTTY from source.


                                                                                                              Written By Danish 


Sunday, July 30, 2023

Networking.

                                                            Networking
 Network  =  It is a connection of multiple host which is used to share data resourse & information  for purpose of                        saving time money & men power is called Network.
         
                                                                    Data
        It is a communication of 1 & 0 or it is collection of information and always store in format.

      abc.txt              Text file
            .doc             word file
            .cdr              corel draw
            .pdf             adobe reader
            .jpeg             Image
            .mp3             Audio
   
                                                            Types of Data
   structure of data               SQL,Orrecal
   Semi structure                   PDF,EMAIL,EXCEL,
   On structure                       Movies, sony, image,
             
                                                              Networking
    
  A process which is used to create manage & maintenance a network is called networking.
  
                                                     Types of Networking
  There are so many types of network.
   LAN     Local Area Network
   WAN    Wide Area Network
   MAN     Metropolitan Area Network
   SAN       Storage Area Network
   CAN       Campus Area Network
   PAN       Personal Area Network

  LAN = Host connected in a room, building, campus, or maximum 3 mile rang is called LAN.
 It is a basic Networking of any Network. It is also known as Ethernet.
 1 mile = 1.6km
 3 mile = 1.6*3=4.8km
    
  WAN = There are no limitation of network Internet is a best example of WAN It is series of LAN.
  MAN =  It is private and secure network of any company it is combination of LAN & WAN  limitation
                of MAN is 100km.
  It is support 100km Rang.
   SAN = A network dedicated for storage.

   CAN = It is Extension of LAN mostly it is a wireless network available in a limited rang.
   PAN = The Network which is used to personal use is called PAN.


To access your mobile camera in laptop

To access your mobile camera on your laptop  Note : Don't miss use it  Download Webcam from Iriun.com (In Laptop) Download Iriun app in ...